Long present in macOS, Automator makes it possible to accomplish tasks by stringing together necessary actions. Some of these actions (but not all) require types of input to proceed. Otherwise, the automatic task cannot proceed.
Creating Quick Flow Workflows
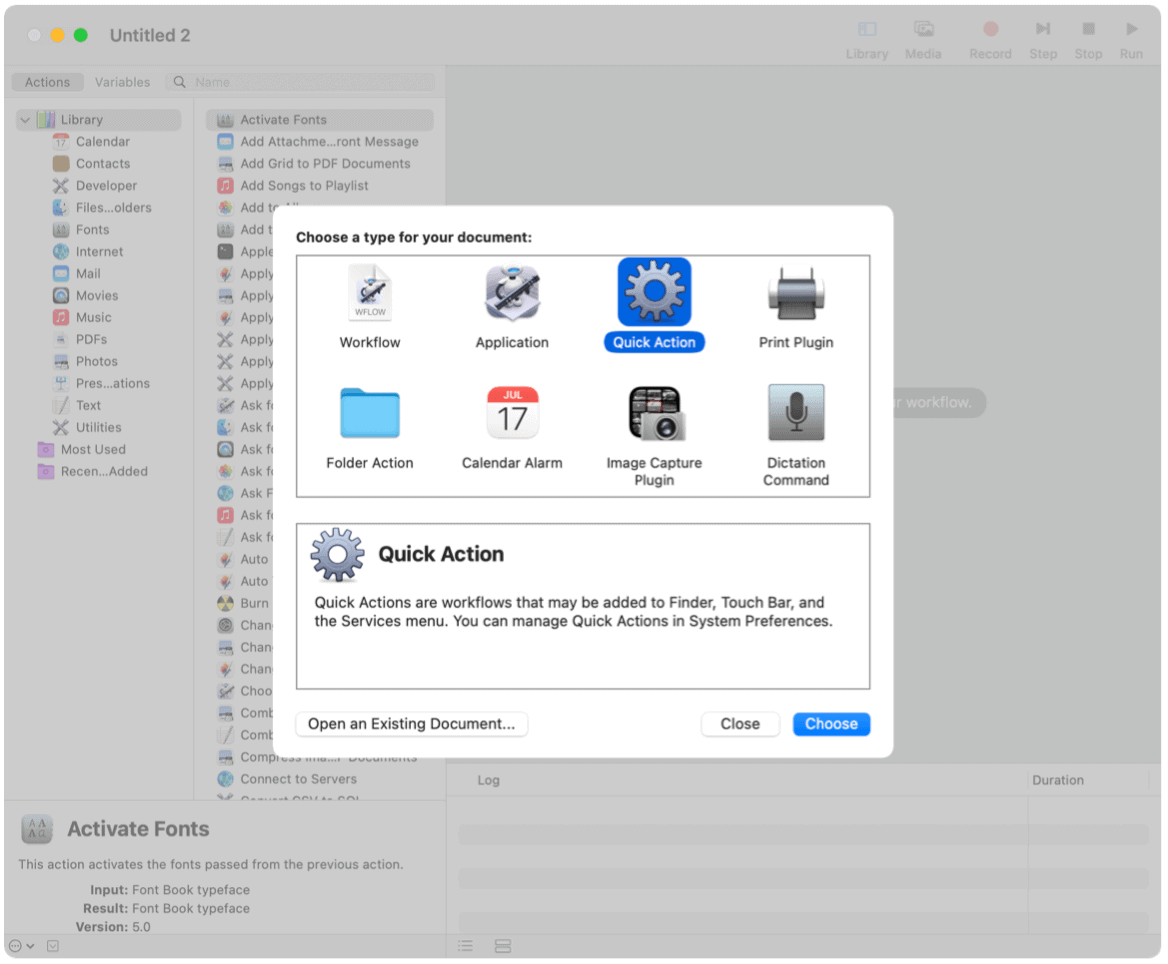
It’s important to understand how Automator is put together before moving on to Quick Actions. If you haven’t used Automator previously, it’s relatively painless. On the left side of the app, you’ll find the library pane to add on or more actions to the workflow, located on the right side of the Automator window. From there, you’ll configure actions, then save your workflow. Follow these steps to get started with Quick Flow workflows:
Next: At the top of the screen, you can specify any of the following:
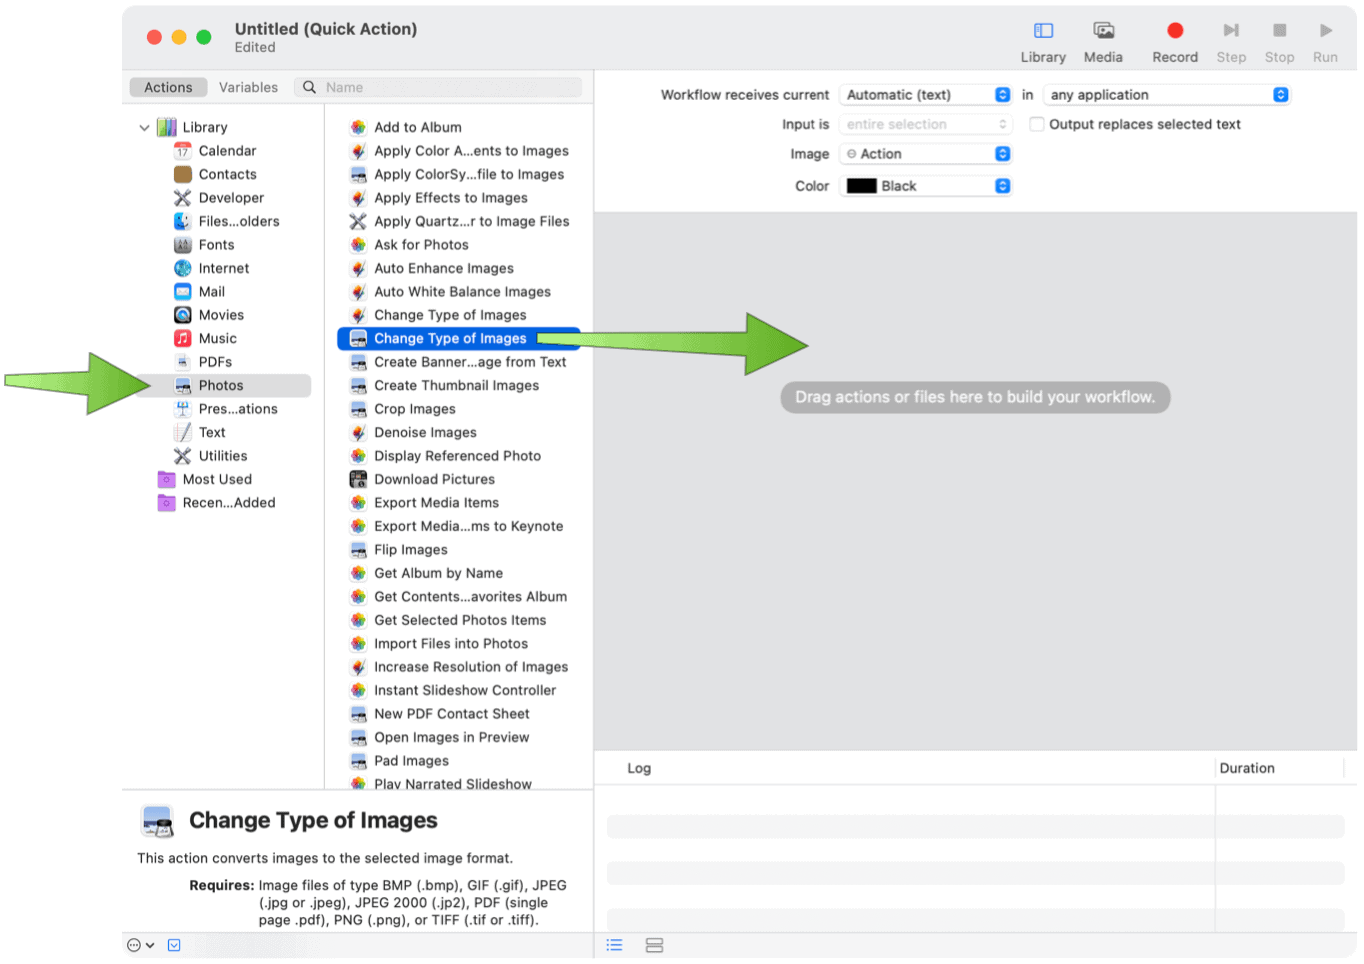
Workflow receives current: The type of data used as input to the workflow. If you choose Automatic, Automator guesses the type of input you want to use in your workflow.Note: Only Quick Actions that receive files as input are available in Finder windows.Application: The app or apps you want to use to process your workflow. Each app must be open for the workflow to be available.Input is: If the workflow receives input from URLs, addresses, phone numbers, dates, or email addresses, you can specify different input options.Output replaces selected text: When the workflow receives input from Text or Rich Text, you can specify that the output replaces the selected text.Image: An image for your Quick Action. You can select an image on your Mac or choose an image from the menu.Color: A color for your Quick Action (visible in the Touch Bar only).
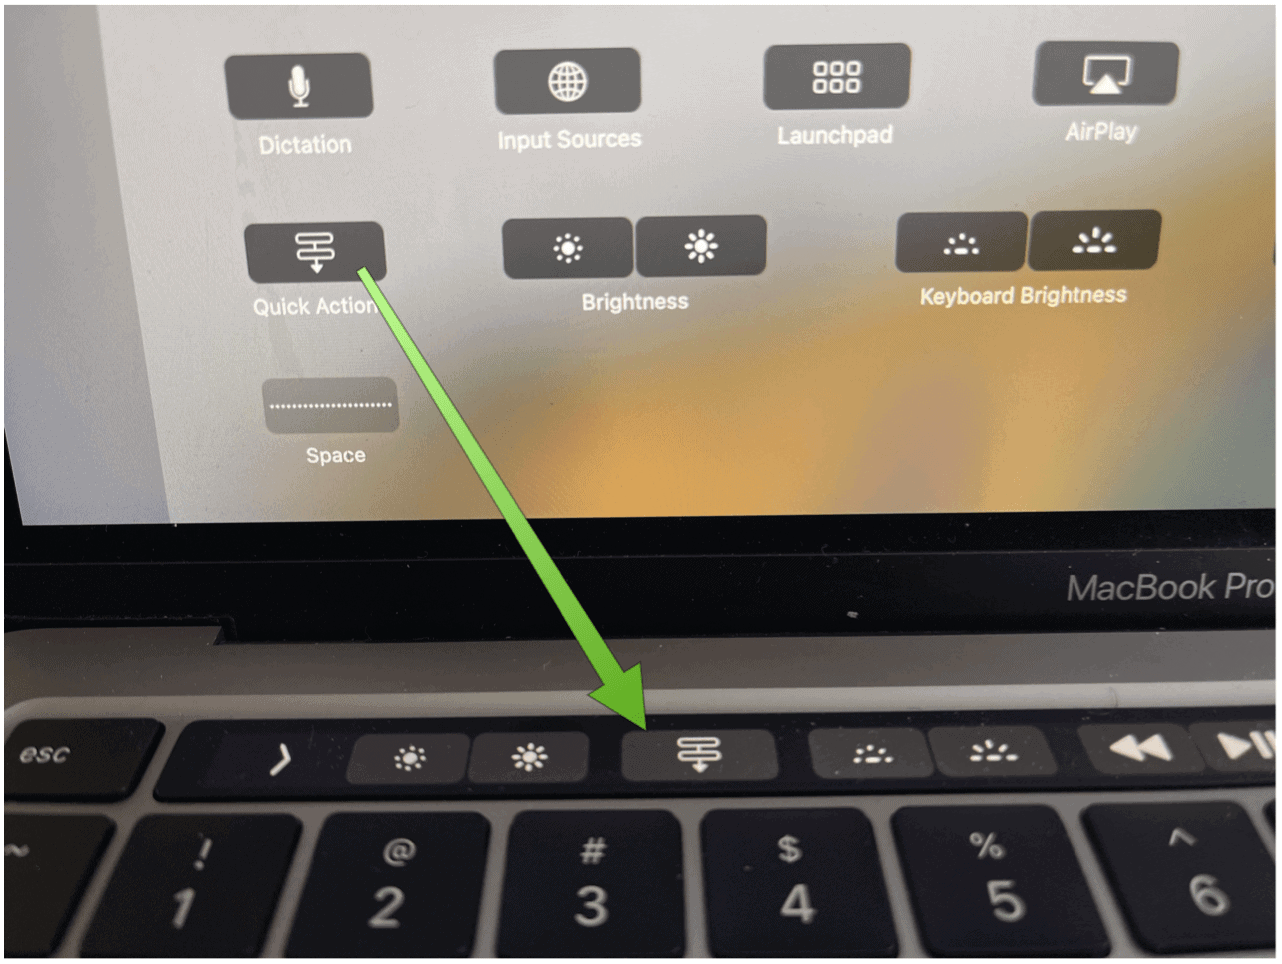
Next: Once a Quick Action gets created, the Action pop-up menu appears at the top of a Finder window or the bottom of the Finder window preview pane in Column or Gallery view. It’s also available in the Service menus and under Quick Actions in the Touch Bar, when applicable, as you can see below.
Quick Action Workflow: An Example
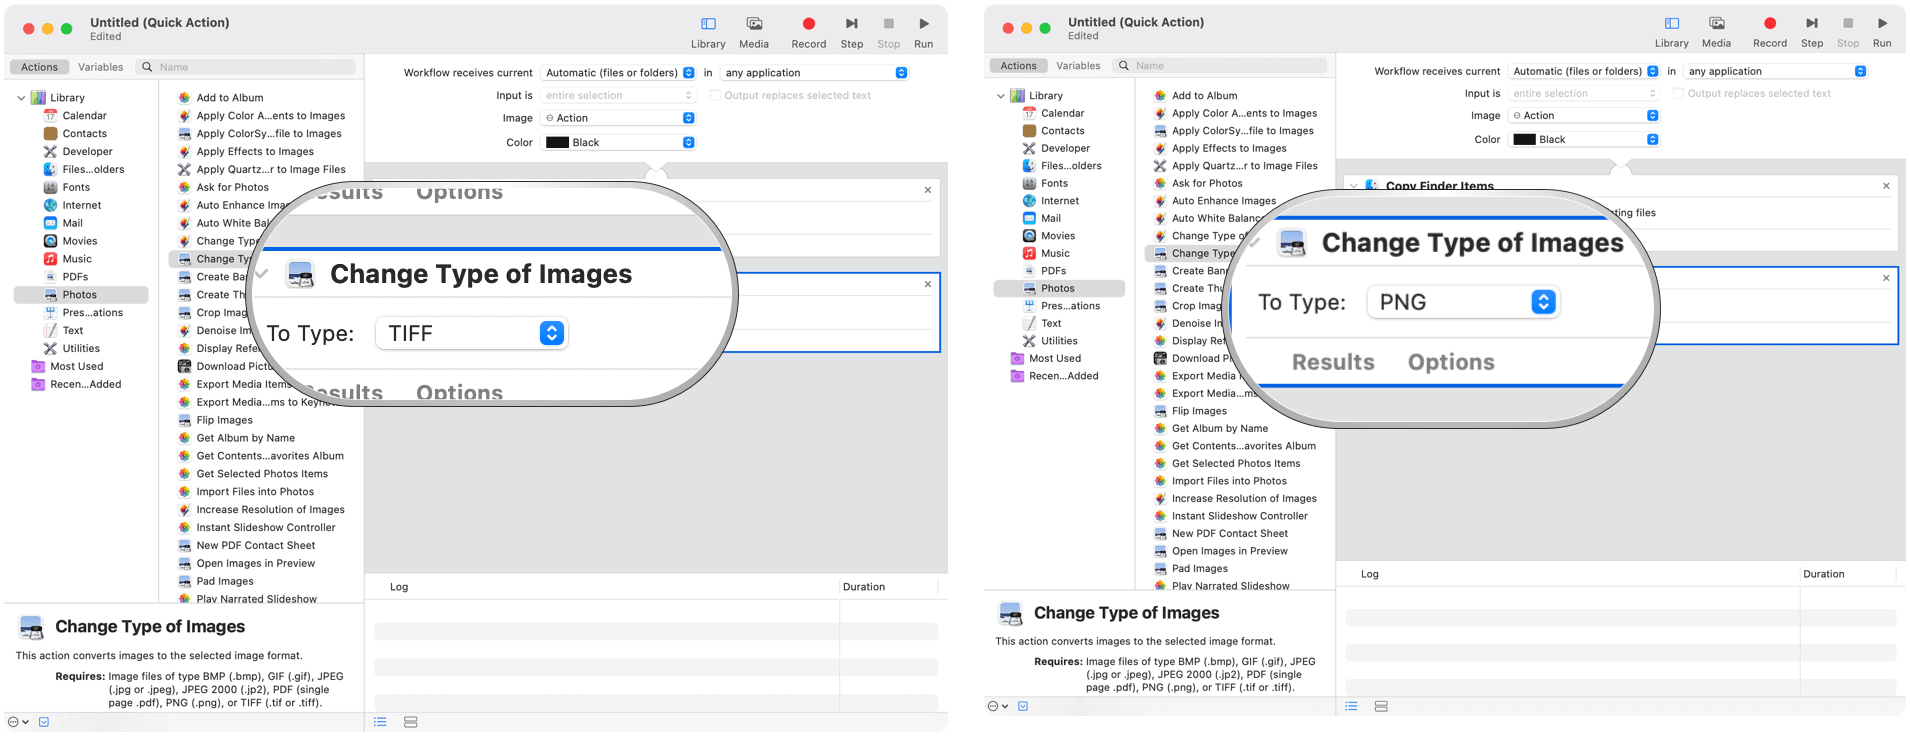
At GroovyPost, we’re asked to convert images to PNG format. Unfortunately, most of the images I find for use in articles are in JPG format. To convert images to PNG from JPG, I typically use Mac Preview. With a custom Quick Action, I can automate this process. To create this Quick Action: In the pop-up, you must decide whether to add an action to copy the image (thereby preserving the original in the process) or skipping over that step. I suggest choosing Add, not Don’t Add, so the original file remains.
Next:
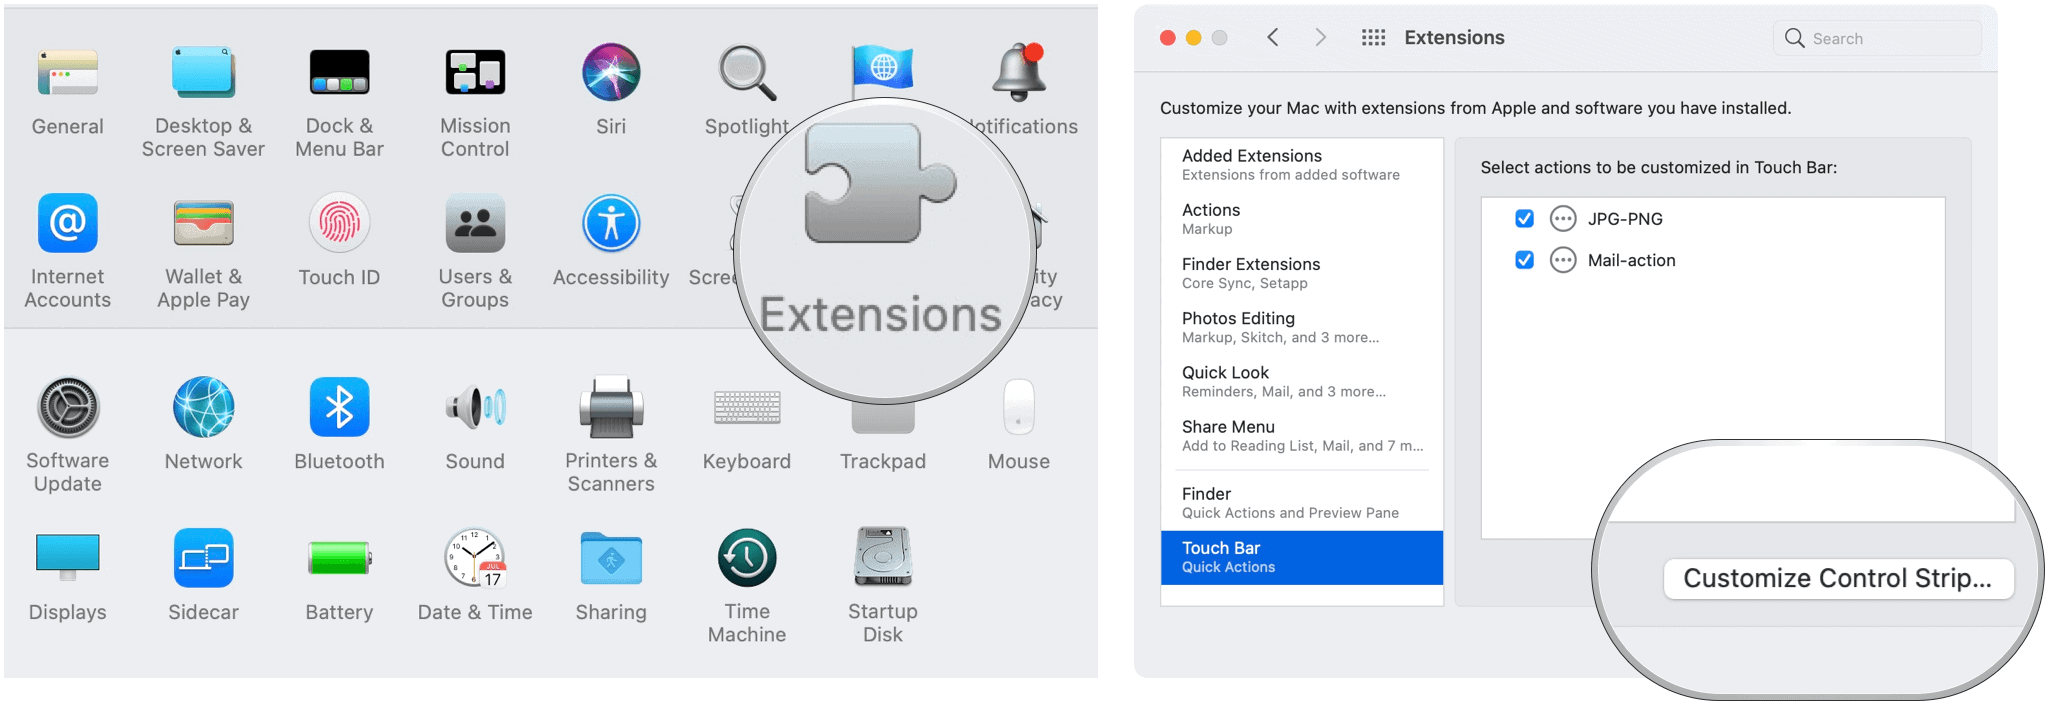
Adding Quick Action Workflows to Touch Bar
To utilize Quick Actions Workflows on your MacBook Pro Touch Bar, you must first add the Quick Actions button by following these directions:
Next:
Customizing Quick Action WorkFlow Access
By default, your Quick Action workflows show up in Finder windows, the Service menu, and the Touch Bar, when applicable. You can adjust which ones show up in the Finder and Touch Bar. Quick Action workflows make it easier to perform often repeated tasks. After setting them up through the macOS Automator, you can find Quick Action workflows on the Finder menu, Services menu, or the MacBook Touch Bar.


![]()
