How To Setup A Loopback Adapter On Windows 7
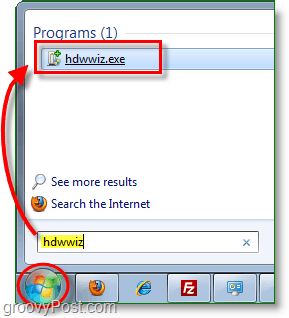
Click the Start Menu Orb. In the search box Type hdwwiz and then Click the hdwwize.exe program link.
Now the Add Hardware wizard should be open. Click Next through the first page, and then on the second Select Install the hardware that I manually select from a list (Advanced). Click Next to continue.
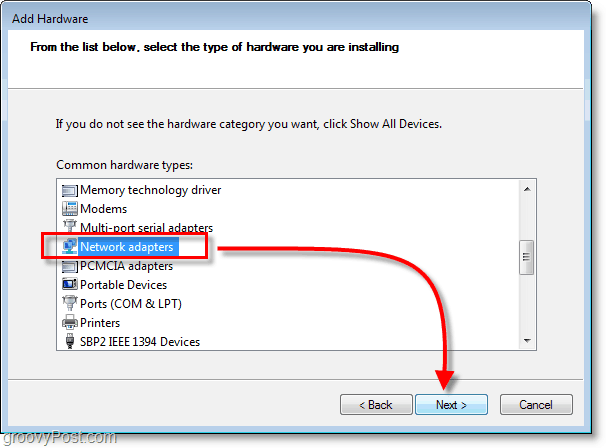
Scroll down the list and select Network Adapters then Click Next.
Give the next window a moment to load, and then click Microsoft and Select Microsoft Loopback Adapter then Click Next.
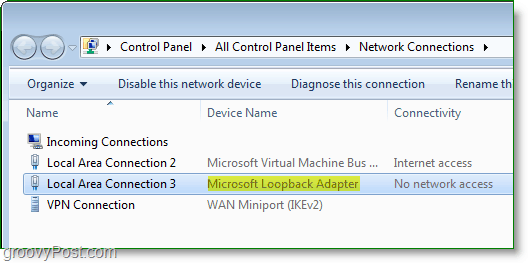
Now the Microsoft Loopback Adapter should be installed, and it will show up in your network connections window. From here you can easily configure your adapter to do whatever you’d like.
Comment Name * Email *
Δ Save my name and email and send me emails as new comments are made to this post.


![]()
