Creating a System Restore point is important before significant events like installing hardware drivers or installing a Windows feature update. But if it isn’t working as intended, there are several ways to fix it. Whether it displays an error or not, if System Restore isn’t working correctly on your Windows PC, this guide will show you how to return its functionality.
How to Check if System Restore is Enabled
The System Restore utility is built into your Windows operating system but isn’t enabled by default. The first thing you’ll need to do is verify that System Restore is turned on. If it isn’t, you’ll need to switch it on. To enable System Restore:
Restart the Volume Shadow Copy Service
Once you confirm the System Restore tool is turned on, you need to check that its associated service is enabled. The Volume Shadow Copy service allows System Restore to take snapshots of files to create restore points. If it isn’t running or set incorrectly, you’ll need to verify that it’s turned on and restart the service. To restart the Volume Shadow Copy service:
Double-Check Group Policy Settings
If System Restore is enabled and the Volume Shadow Copy service is running, another good place to check is your Group Policy settings. If you’ve recently changed user settings via Group Policy, it’s easy to disable the ones you need inadvertently. To double-check Group Policy settings for System Restore:
Check Restore Point Drive Space
For System Restore to work properly, you must ensure it has enough storage space to store the snapshots it creates. So, if there isn’t enough allocated drive space, it won’t work. Luckily you can adjust the disk space it uses through settings. To check and change Restore Point drive space: It’s also important to note that you can lower the usage here to make System Restore use less drive space on Windows. In addition, if you are getting low on drive space, you can delete old Restore Points. If your PC has a low-capacity drive, you’ll need to find other ways to free up disk space so System Restore has enough to run.
Fix Corrupt System Files
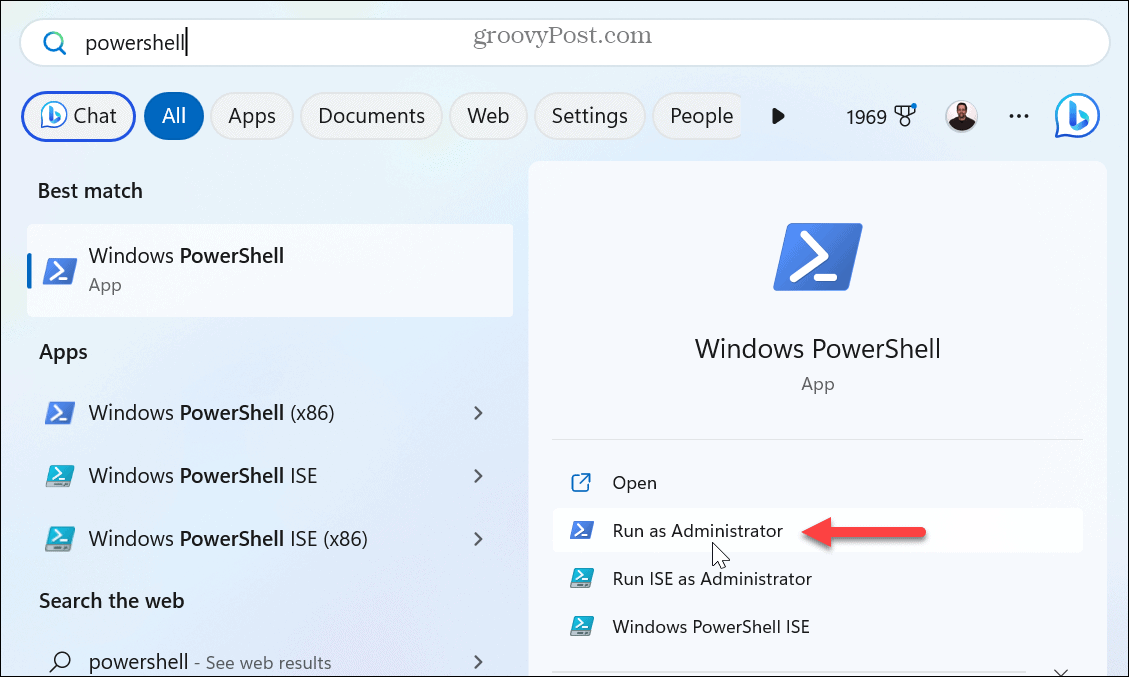
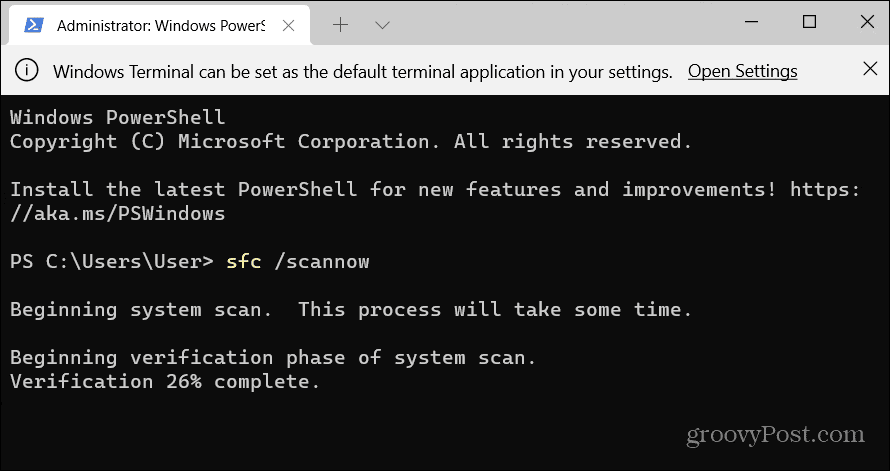
Another reason System Restore isn’t working is due to corrupt system files. Thankfully, Windows includes two utilities that will check for corrupt files and fix them. Running an SFC and DISM scan from the command line checks the core system files and fixes them if they’re corrupt or damaged. To run SFC and DISM scans: Note that these scans can take a while to complete, and the time varies between PCs. Once the scans are complete, check if System Restore works. If it still isn’t working, you can use a few last-resort options. For example, you can use the reset your PC feature to return it to factory settings. Note that a reset gives you a choice of keeping your files. If that doesn’t work, you can always do a clean install of Windows. Just remember, before using a reset or clean install option, create a full system backup to use the image to restore your PC.
Fixing Windows Errors
If System Restore isn’t working on your PC, using the above troubleshooting solutions should get you back in business. It is helpful to restore your PC to a working state in many situations, and you need System Restore to work as it should. There are other core features in Windows you may need to address. For example, you might need to fix a Windows cannot find the specified device error or get the Windows key + Shift + S Snipping Tool working. Also, if you are archiving files and folders, you may need to fix a Zip error on Windows 11. And if you are getting a specific error code, check out how to fix a 0x8007045d error on Windows. Blue screen errors can be particularly jarring, and one you may need to fix is Clock_Watchdog_Timeout. Comment Name * Email *
Δ Save my name and email and send me emails as new comments are made to this post.
![]()


