Decrypt DVD and Copy it to your Hard Drive
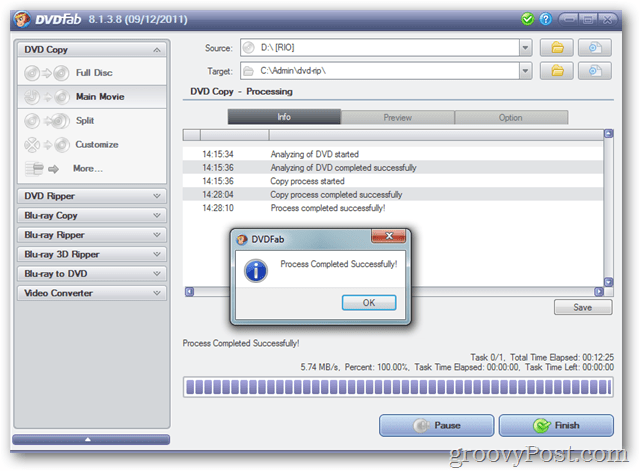
First, we need to decrypt the DVD and copy its contents to our hard drive. To do this use, a free application called DVDFab. Ripping a DVD with DVDFab is simple, and Brian Burgess here at groovyPost wrote a step-by-step in his tutorial on how to convert a DVD to an ISO File. Follow his steps up to where he tells you to test the VOB files with VNC then continue below with Step 2.
Install HandBrake and Transcode the Video/Audio files
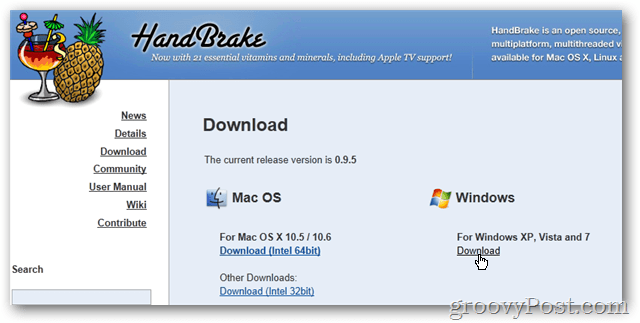
Now that DVDFab copied the DVD to our hard drive, its time to convert the files to a format our iPad / iPhone can read. We will do this with another free Application, Handbrake. Open a browser and visit the Handbrake Download Page. Download the version for your OS. In my example, I will be using the Windows Version.
Run the installer and accept all the defaults. Click Finish after the install is completed to launch HandBrake.
Configure Handbrake
Once installed, we need to configure a few settings in the HandBrake transcoding application. Click Tools > Options.
Under the General Tab, Click Browse to set a Default Path for new files.
Navigate to where you want to store the files HandBrake will create for your iPad / iPod. In my example below I created a folder under c:\dvd-rip\handbrake. Click OK when done.
Now click Close to save your changes.
Convert DVD Files Using Handbrake
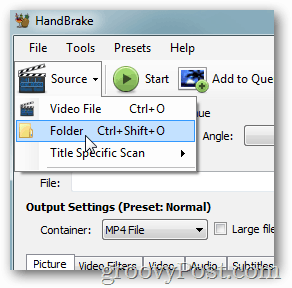
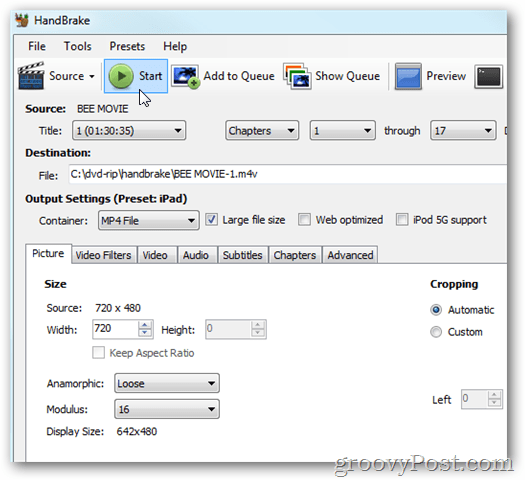
Now it’s time to convert the DVD files you created using DVDFab. Click Source > Folder
Navigate to where you stored the files copied using DVDFab, Click it and Click OK
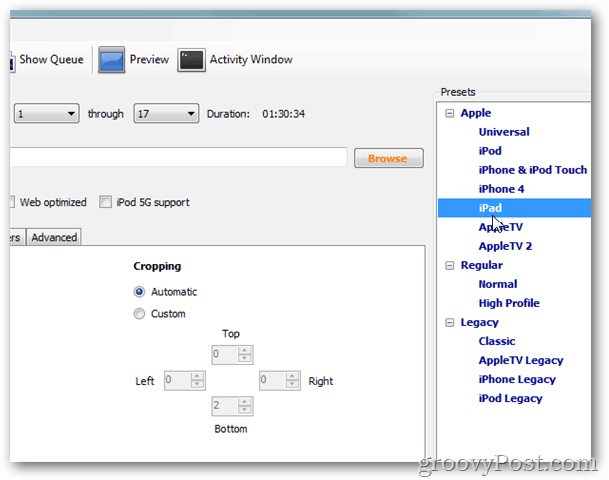
On the right-side, Click the iPad presets
Click Start to begin the encoding.
The encoding time will vary on the file size and your PC performance. HandBrake adds a progress bar at the bottom of the window so you can monitor the % complete and time remaining.
Copy the Movie into iTunes
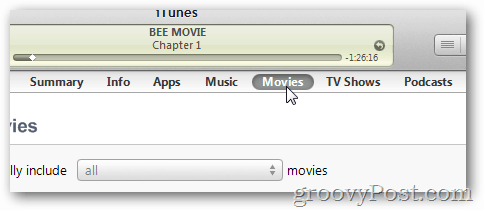
Once the Encoding completes we will finish off the process by copying the newly encoded movie into iTunes. Start by opening iTunes and click the Movies Tab.
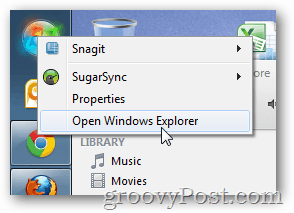
Now we need to find the file we just Encoded. Right-Click the Windows Start Button and Click Open Windows Explorer.
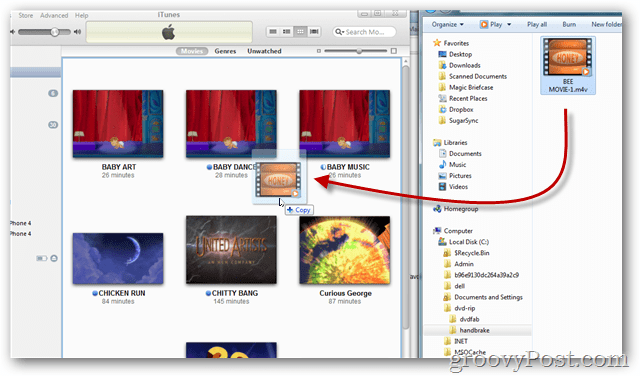
Navigate to the default save location you configured above for HandBrake. The DVD you just encoded should be there.
Drag the movie into the Movies Section of iTunes.
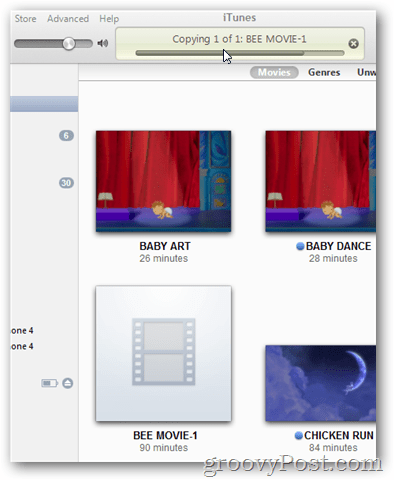
Wait… iTunes will automatically import the video. The length of time will depend on the size of the video.
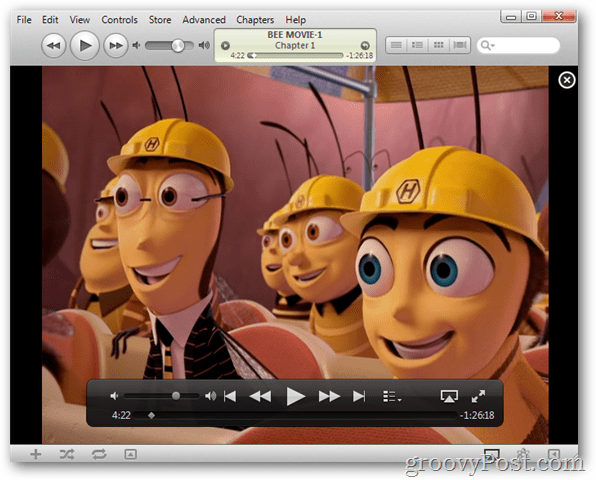
Test the movie once inside iTunes to verify the encoding and copy was successful
Looks good!
If you need to fix the name of the Movie (or give it a new custom name), click the Name of the Movie under its Icon. Type in the desired name.
Sync the Movie to your Device
With the Movie now in iTunes, connect your iDevice (iPhone, iPod, iPad) and click it under Devices.
Click the Movies Tab
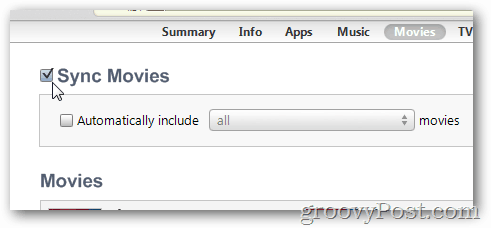
Check the Box Sync Movies
Check the box for all Movies you wish to Sync.
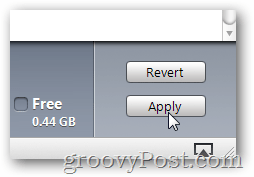
Click Apply to save the changes and Sync the Movie to your Device.
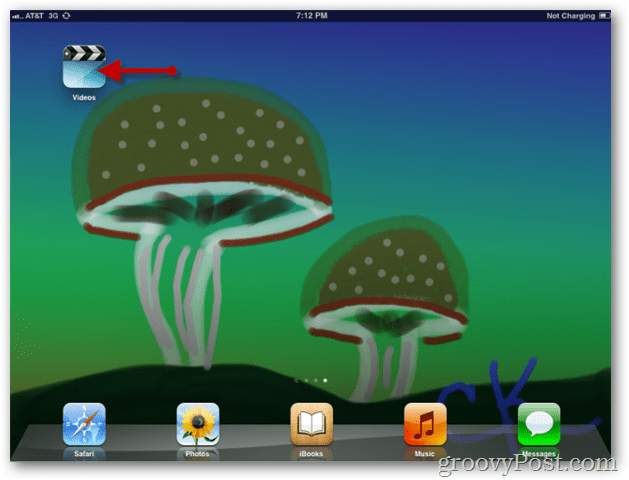
From your Device, open Videos on your iPhone or iPad
Tap the Movie you want to watch.
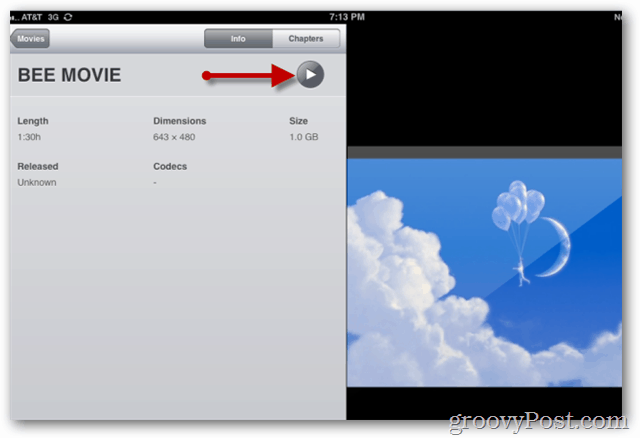
From the details menu, Tap the Play button to start the Movie.
Enjoy a quiet flight! ;)
Thanks for reading! How do you do this using a Mac. Thanks Any thoughts? Thanks, Tony– Well, you “could” in fact I’ve done it. What I do however is once the movie is converted into mp4 format via Handbrake, I drag and drop it onto itunes and share it out that way to my Apple TV. That’s how we watch all our movies now, both my wife and my kids. All via ripped DVD’s (which I own) sitting in my itunes folder on my PC. Comment Name * Email *
Δ Save my name and email and send me emails as new comments are made to this post.


![]()
